

Split one GeForce GPU across Proxmox VMs: geforce-sriov guide
Standard PCIe passthrough in Proxmox VE is an all-or-nothing trade. When you pass an NVIDIA GeForce graphics card to a Windows gaming VM or a Plex media server, that single virtual machine claims the entire physical card. The rest of your homelab gets zero GPU compute.
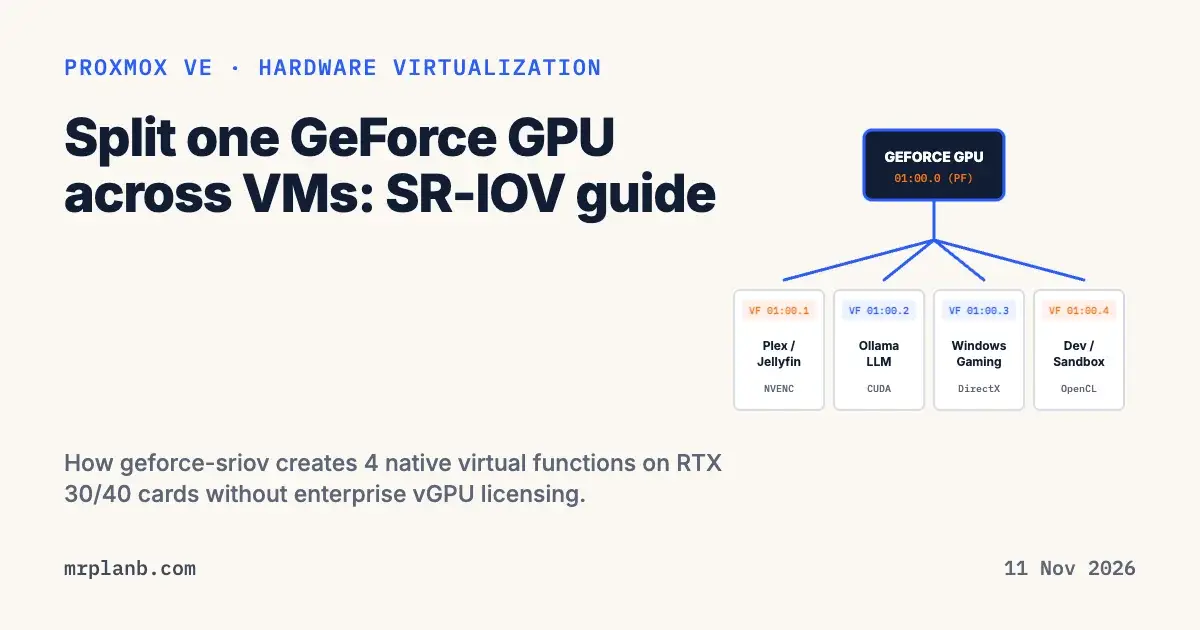
The open-source geforce-sriov project changes this dynamic. Released with expanded compatibility in version 0.2.2 on 10 November 2026, the tool unlocks native Single Root I/O Virtualization (SR-IOV) on consumer GeForce GPUs. You can now slice a desktop RTX 3000 or RTX 4000 card into up to four virtual functions, sharing one physical card across multiple Proxmox virtual machines simultaneously.
Here is how the tool works, what hardware it requires, and how to configure it on a Proxmox VE host.
How geforce-sriov differs from traditional vGPU
Homelab users wanting shared GPU compute previously had two choices: container passthrough or enterprise vGPU emulation.
Container passthrough shares a GPU between the Proxmox host and multiple LXC containers using mapped device files (/dev/nvidia*). While fast, it cannot pass a GPU to full QEMU virtual machines running Windows or specialized Linux distributions.
Enterprise vGPU (NVIDIA GRID) creates mediated virtual devices (mdev) for full VMs. However, NVIDIA locks this feature behind commercial enterprise licensing. Running it in a homelab historically required community patches and self-hosted license emulator servers that regularly broke after driver updates.
The geforce-sriov tool takes a hardware-native approach. Ampere (RTX 3000) and Ada Lovelace (RTX 4000) silicon contains hardware SR-IOV circuitry that NVIDIA disables in consumer firmware. The geforce-sriov kernel module and helper script re-enable these capabilities, allowing the PCIe bus controller to instantiate up to four genuine Virtual Functions (VFs). Each VF presents itself as a distinct PCIe device (for example, 0000:01:00.1 through 0000:01:00.4) that Proxmox can assign to separate VMs using standard PCIe passthrough.
Hardware and BIOS prerequisites
Before touching the Proxmox command line, confirm your hardware meets three foundational requirements:
- Compatible GPU: You need an NVIDIA RTX 3000 or RTX 4000 series desktop card. Older cards (GTX 1000, RTX 2000) lack the necessary hardware architecture.
- Motherboard SR-IOV support: Reboot into your motherboard BIOS or UEFI setup. Enable Intel VT-d or AMD IOMMU, and verify that SR-IOV Global Enable is set to Enabled.
- Resizable BAR: Enable Above 4G Decoding and Resizable BAR in your motherboard BIOS. Without Resizable BAR, allocating video memory slices across multiple virtual functions will fail during driver initialization.
Preparing the Proxmox VE host
Log into your Proxmox VE host as root via SSH or the web console.
First, ensure your IOMMU configuration is active. Check /etc/default/grub to confirm your kernel command line contains intel_iommu=on or amd_iommu=on, followed by iommu=pt. If you edited the file, run update-grub and reboot.
Install the required kernel build headers and development dependencies:
apt update
apt install -y pve-headers-$(uname -r) build-essential dkms git
Ensure no conflicting open-source nouveau drivers or default NVIDIA desktop packages are loaded. The geforce-sriov project requires proprietary NVIDIA Linux driver packages. If you previously installed drivers using the distribution package manager, uninstall them cleanly before proceeding.
Installing geforce-sriov
Clone the project repository from GitHub:
git clone https://github.com/noon-at-cgn/geforce-sriov.git
cd geforce-sriov
Run the installation script. The script compiles the custom kernel module and patches the proprietary driver loader:
./install.sh --kernel-module-type=proprietary
Note on version 0.2.2: If you encounter a kernel text layout mismatch during installation, ensure you are running the proprietary driver installer rather than the open-source driver package (nvidia-driver-open).
Once the installation completes, perform a full cold power cycle of the physical host. A soft reboot is often insufficient to reset the PCIe configuration registers on consumer desktop motherboards:
systemctl poweroff
Turn the server back on after ten seconds.
Enabling Virtual Functions
After booting back into Proxmox VE, check that the host recognizes the SR-IOV capabilities of your graphics card.
Find your GPU's PCIe bus address using lspci:
lspci -nn | grep -i nvidia
Assume your physical GPU sits at 0000:01:00.0. Check how many virtual functions the card can spawn:
cat /sys/bus/pci/devices/0000:01:00.0/sriov_totalvfs
Most Ampere and Ada consumer cards report 4. To enable all four virtual functions, write the desired count to sriov_numvfs:
echo 4 > /sys/bus/pci/devices/0000:01:00.0/sriov_numvfs
Run lspci -nn | grep -i nvidia again. You will now see your primary controller alongside four new Virtual Function devices:
01:00.0 VGA compatible controller [0300]: NVIDIA Corporation GA106 [GeForce RTX 3060] [10de:2504]
01:00.1 VGA compatible controller [0300]: NVIDIA Corporation GA106 [GeForce RTX 3060 VF] [10de:2504]
01:00.2 VGA compatible controller [0300]: NVIDIA Corporation GA106 [GeForce RTX 3060 VF] [10de:2504]
01:00.3 VGA compatible controller [0300]: NVIDIA Corporation GA106 [GeForce RTX 3060 VF] [10de:2504]
01:00.4 VGA compatible controller [0300]: NVIDIA Corporation GA106 [GeForce RTX 3060 VF] [10de:2504]
To make this persistent across reboots, add a small systemd service or an /etc/rc.local rule that writes 4 to sriov_numvfs during system startup.
Assigning Virtual Functions to Proxmox VMs
Once the virtual functions appear on the host, assigning them to virtual machines follows standard Proxmox PCI passthrough procedures:
- Open the Proxmox VE web interface and select your target VM.
- Navigate to Hardware > Add > PCI Device.
- In the Device dropdown, do not select the physical device
01:00.0. Instead, select one of the virtual functions:01:00.1for your first VM,01:00.2for your second VM, and so forth. - Tick All Functions and PCI-Express. Leave Primary GPU unticked if you want to retain the virtual SPICE display console for administration.
- Click Add and power on the VM.
Inside the guest operating system (Windows or Linux), install standard NVIDIA display drivers. The guest operating system sees a genuine NVIDIA device and loads hardware acceleration for video decoding, 3D rendering, and CUDA compute tasks.
Practical operating tips
- Memory split: The hardware slices available VRAM across active virtual functions. On a 12 GB RTX 3060 with four active VFs, each guest VM receives approximately 3 GB of dedicated video memory. Plan your guest workloads accordingly.
- Transcoding plus LLMs: A balanced homelab configuration allocates one VF to a Jellyfin or Plex media server (NVENC hardware transcoding uses minimal VRAM) and assigns two VFs to a Linux VM running local LLMs with Ollama or vLLM.
- Kernel upgrades: When Proxmox updates its PVE kernel package during regular security patches, the custom module must be rebuilt. Keep your
geforce-sriovrepository directory intact so you can re-run./install.shif a new kernel breaks the module.
Frequently Asked Questions
Which NVIDIA graphics cards work with geforce-sriov?
The project supports consumer Ampere and Ada Lovelace GPUs, including the GeForce RTX 3000 and RTX 4000 series. Turing cards like the RTX 2000 series and older Pascal cards do not expose the required hardware registers.
Do I need an NVIDIA vGPU software license or license server?
No. Traditional vGPU setups rely on mediated devices (mdev) and require an NVIDIA GRID license server. The geforce-sriov tool unlocks native hardware SR-IOV virtual functions directly at the PCIe layer, avoiding license daemons entirely.
Can a gaming VM and a media transcoder use the card at the same time?
Yes. Once the physical card is split into virtual functions, each virtual function attaches to a different virtual machine or container as an independent PCIe device with its own dedicated memory partition.
Does geforce-sriov survive kernel updates in Proxmox VE?
Major Proxmox kernel upgrades often require rebuilding the proprietary NVIDIA kernel module. Pin your working kernel or reinstall the module package after a pve-kernel update.